DIY Winter Yarn Mini Hats: Craft with What You Have at Home
One thing I love about the holiday season is noticing those tiny details that make holiday decor or gifts feel extra special—bonus points when those details are handmade with items already in your home! These Winter Mini Yarn Hats have been my go-to craft this year.
I’ve added them to wine and liquor bottles for gifts, and they always earn compliments for the thoughtful touch. My family and friends love spotting these hats in creative places, like on my bar setup, perched on plant leaves for a cozy "fashion upgrade," or even topping hot sauce bottles during holiday meal gatherings.
These adorable winter yarn mini hats are the perfect way to sprinkle festive charm throughout your home, and the best part? You can make them with simple, everyday supplies!
Here’s a step-by-step guide to creating these cute little hats.
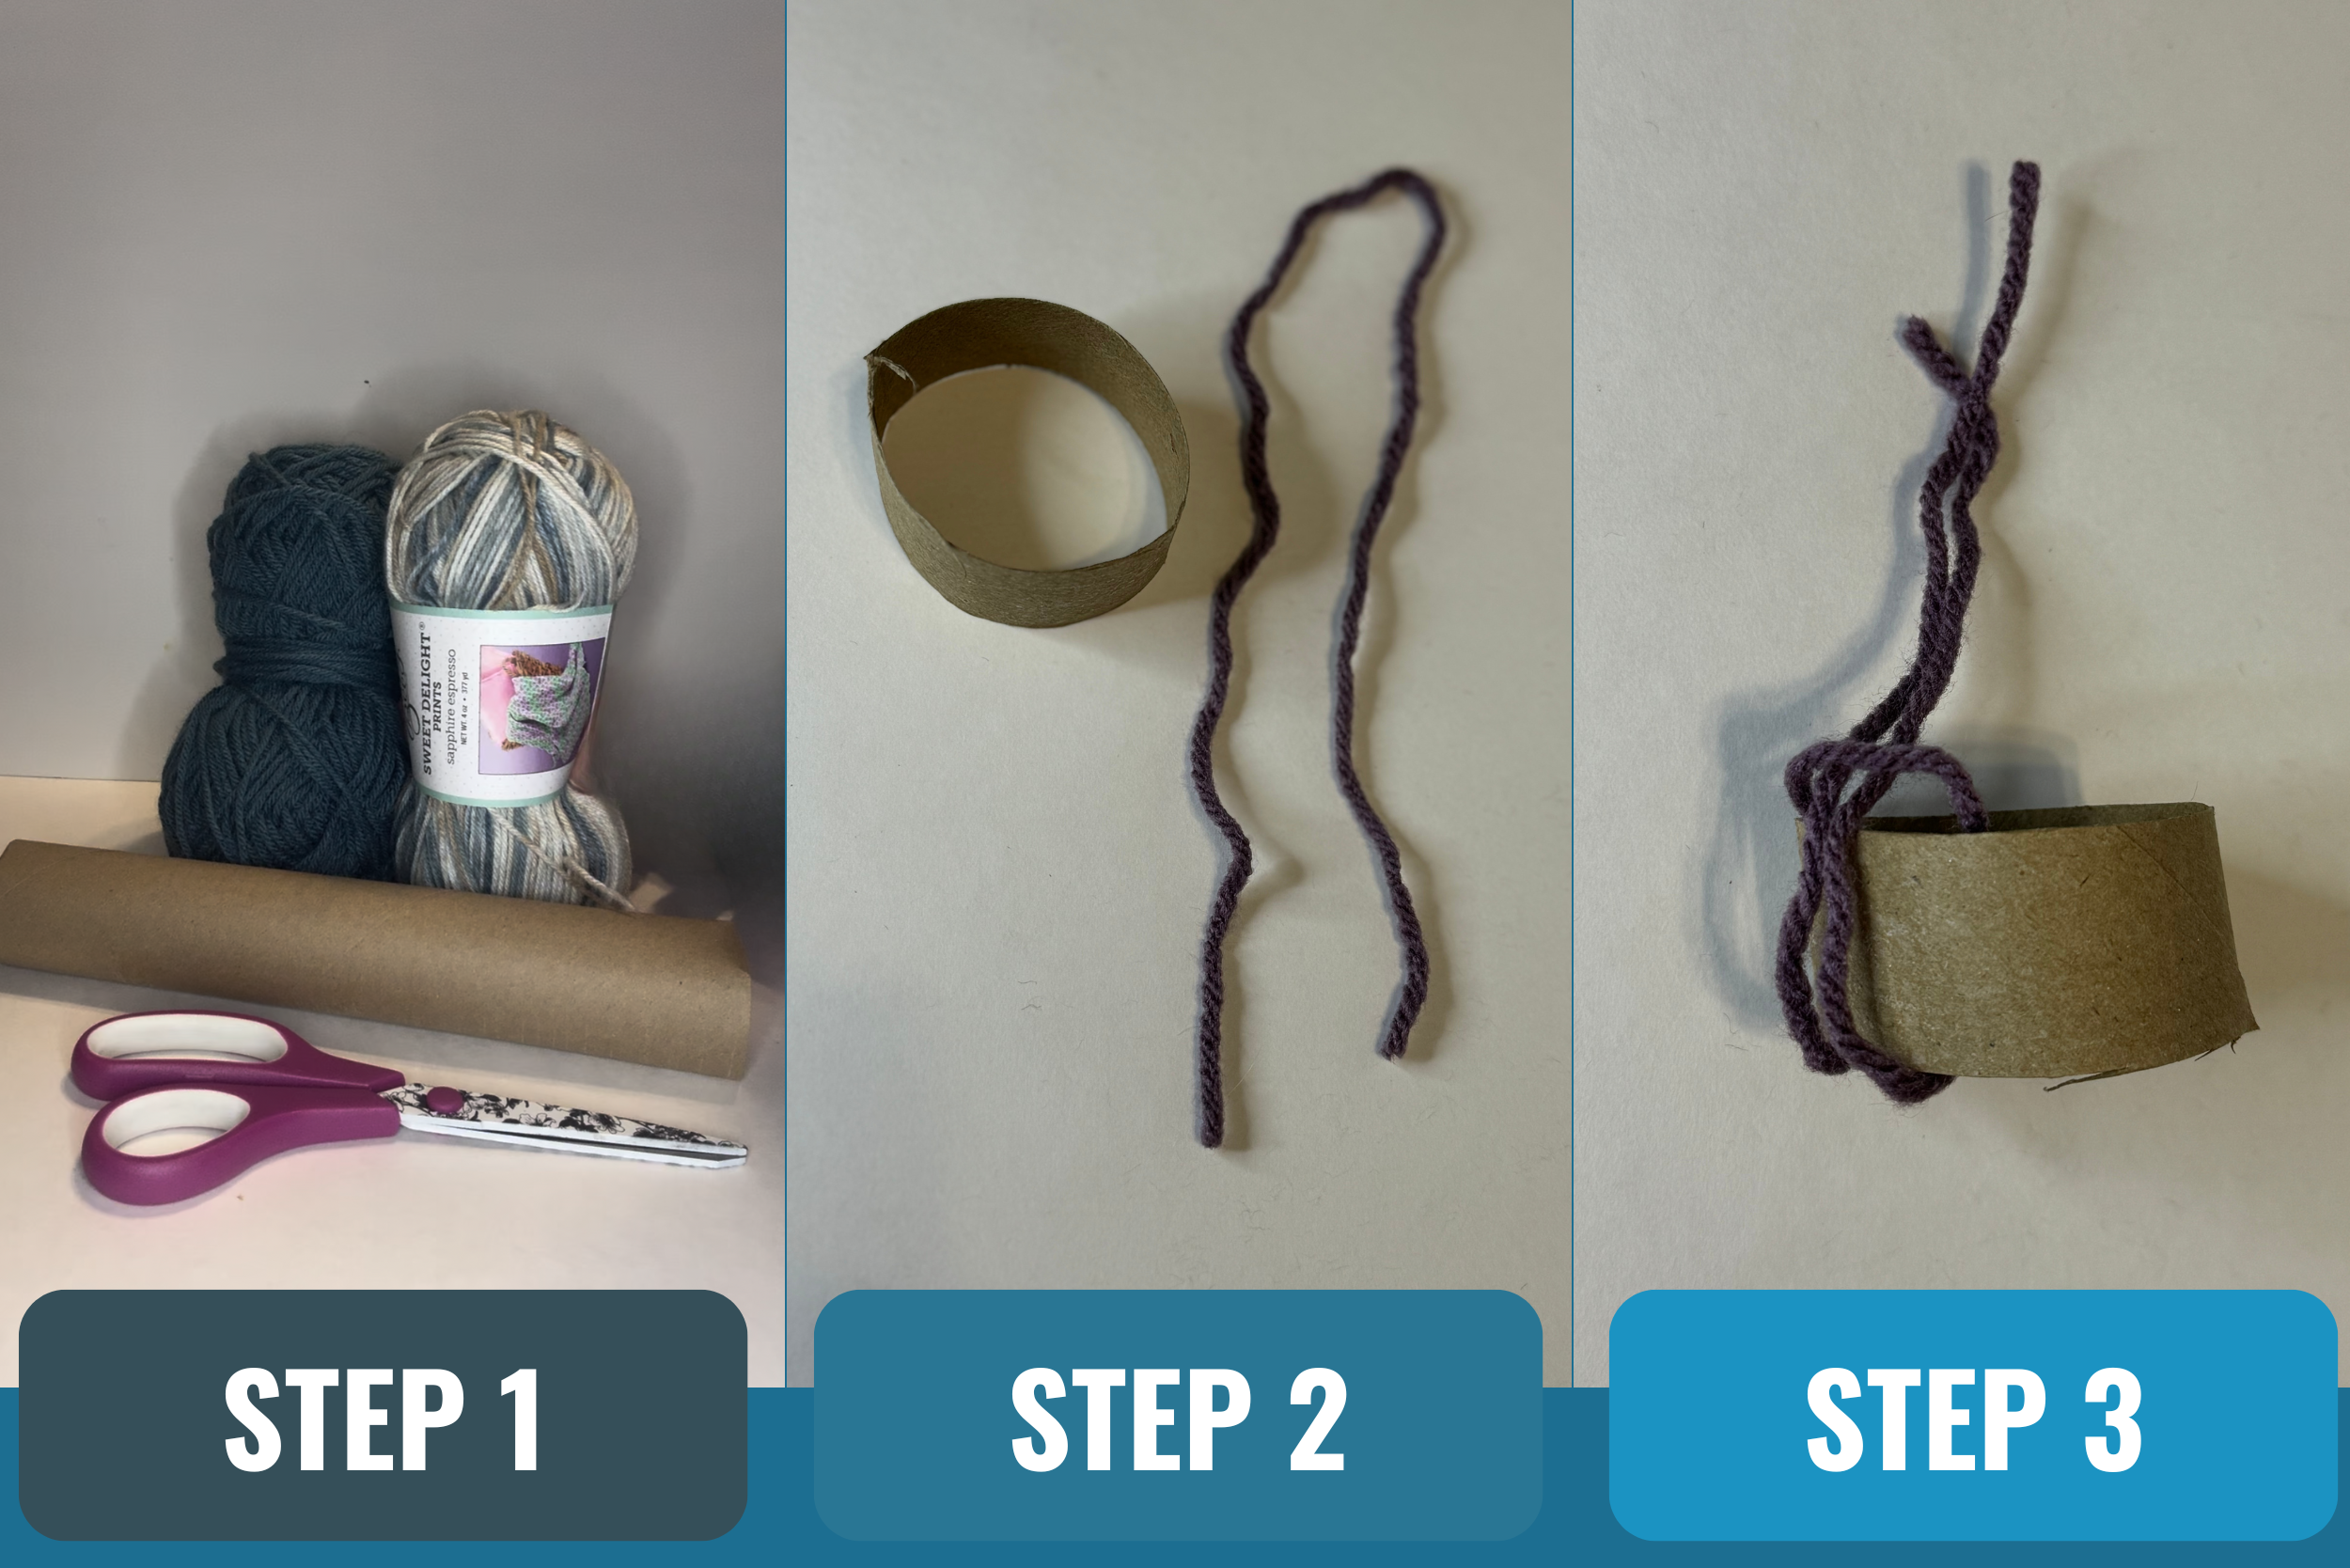
Supplies You’ll Need
- Cardboard Roll*: A toilet paper roll, paper towel roll, or any cardboard tube you have.
- Scissors: Sharp enough to cut through the cardboard.
- Yarn: Any kind of yarn will work. Thicker yarn fills up the hats more quickly, but thinner yarn works just as well.
Step 1: Cut the Cardboard Roll
Start by cutting your cardboard roll into smaller rings. Each ring should be about 1–1.5 inches wide (roughly the width of two fingers). Don’t worry if the cuts aren’t perfect—minor adjustments can be made as you go!
Step 2: Prepare the Yarn
Cut your yarn into pieces about 10–12 inches long. You’ll need around 40–60 pieces to completely cover one cardboard ring, depending on its size.
Step 3: Attach the Yarn
1. Fold one piece of yarn in half, creating a loop.
2. Push the looped end through the cardboard ring from the outside.
3. Take the two loose ends of the yarn and pull them through the loop, securing it around the cardboard.
4. Repeat this process, adding pieces of yarn side by side, until the entire cardboard ring is covered. Make sure all the yarn knots are lined up on one side of the ring.
Step 4: Shape the Hat
1. Once the cardboard ring is fully wrapped in yarn, take all the loose yarn strands and fold them through the center of the ring, pulling them inside out. This will create the rounded "hat" shape.
2. Adjust the bottom of the hat so the knots are neatly tucked inside. This step ensures your hat fits snugly on various bottle or plant sizes.
Step 5: Tie and Trim
1. Gather the loose yarn strands at the top of the hat.
2. Take a single piece of yarn and wrap it tightly around the gathered strands, securing them in place. This forms the top of your hat.
3. Trim the excess yarn above the tie to create a pom-pom. You can make the pom-pom as short or long as you prefer!
Where to Use Your Mini Hats
- Bottle Toppers: Add them to wine or alcohol bottles for a festive bar display.
- Plant Decorations: Top off your indoor plants for a playful, seasonal vibe.
- Table Setting Accents: Place them on condiment, sauce bottles or other decor for holiday gatherings.
Share Your Creations!
We’d love to see how you use these mini hats in your holiday decor! Tag us in your photos or videos on social media to share your creative ideas.
Get #krafting, and enjoy this simple yet festive DIY project!